Downloadable and printable PDF instructions.
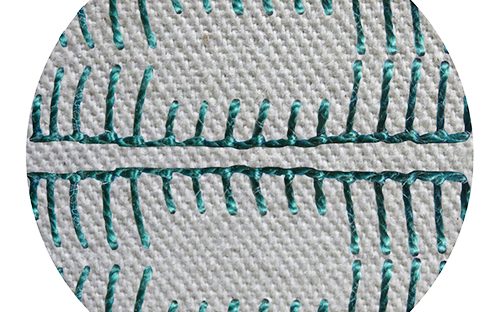
Essentially the same thing, the only difference between the two stitches is the spacing between them. They are listed in the table below, in the order is which they appear in the video clip at the bottom of the tuition page, with the starting time for each stitch in the right-hand column.
| Blanket Stitch | 9 seconds |
| Buttonhole Stitch | 59 seconds |
In the video clip on this page, the small samples were worked with perle no. 5 thread on 2 parallel and horizontal straight lines. If you wish to experiment with the stitch before you work it onto your project, work on similar lines with similar thread.
- With a heat erasable pen, draw 2 horizontal parallel lines placing them about 10 mm apart.
Working the stitch:
Work between the lines, starting on the bottom line and pulling towards yourself. The purl (or ridge) of the stitches will form on the bottom line.
A single buttonhole or blanket stitch looks like a reversed capital L.

This doesn’t matter if you are working a circle because you will work around the circle until you get back to where you started. If you are working a straighter line, it means that if you go straight into working the first stitch, you will have a missing leg, as indicated by the arrow in the illustration above. So, the trick is to fill in the leg before it is missing by starting with a straight stitch.

- Working from left to right, bring the needle up on the bottom line, where you require the purl.
- Take the needle in on the top line to create a straight stitch.

- Bring the needle up on the bottom line, coming out of the same hole that you came out of when you started the straight stitch.
- Leaving a space, go in on the top line, and without pulling through, come out again on the bottom line, directly below where you went in on the top line, with the thread looped under the needle.
- Pull through.
If you are working Blanket Stitch, leave a gap when you go in at the top edge and again at the bottom edge when you come up to catch the loop and pull through to finish the stitch.
If you are working Buttonhole Stitch leave only enough space to form the stitch without pushing the existing stitches out of place. Whilst not quite as close, your spacing is similar to satin stitch so that the finished product looks like satin stitch with a purl on the one edge.

- Continue adding stitches in this way making sure that, if you are creating blanket stitch, the gaps that you leave between the stitches are even.
- It is worth noting that if you are working the stitch on a curve with the purl on the outside of the curve, you will leave a slightly smaller, but evenly spaced gap on the top line so that the stitch fans around evenly.
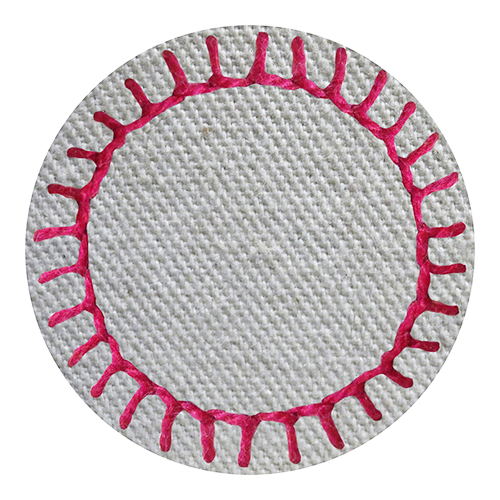
- The image at the top of these instructions is a circle of blanket stitch with the purl on the inside of the curve. This required that the gaps between the stitches opposite the purl edge were worked further apart with those between the stitches on the inside were closer but nevertheless, evenly spaced.

Referring to the video clip, in conjunction with the diagram above, secure at the end with a small couching stitch over the last loop.
And now for the video clip that covers all of the above.
(Don’t forget to click the icon in the bottom right-hand corner to get it to full screen).

