
There are two versions of Outline Stitch in the video clip on this page. They are listed in the table below, in the order is which they appear, with the starting time for each variety in the right-hand column.
| Outline Stitch on a straight line | 22 seconds |
| Outline Stitch on a curved line | 2 minutes 52 seconds |
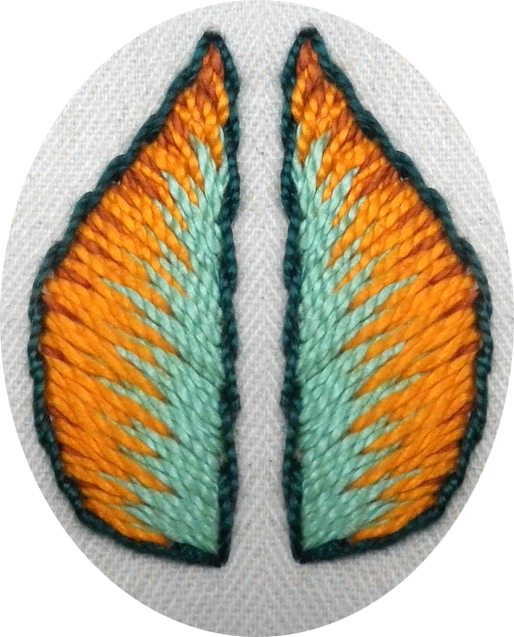
In the video clip on this page, the small sample was worked with perle no. 5 thread on a leaf shape. If you wish to experiment with the stitch before you work it onto your project, the template for this leaf is in the downloadable PDF instructions and you should work it along similar lines with similar thread.
- With a heat erasable pen, draw the template on your cloth.
Working the stitch:
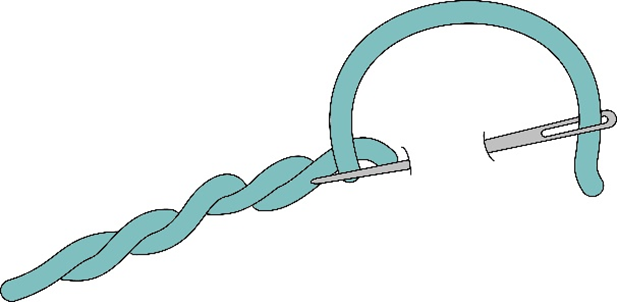
- It is usually best to do this stitch with one strand of thread.
- Working from left to right, come up at the beginning of the line.
- Go in on the line and before pulling the thread through, come up halfway back on the line. Pull through.
- Go into the fabric halfway further and come up just a little past halfway back, so that you are not coming up in the same hole as where the first stitch finished.
- Continue to the end of the outline. Take your thread to the back and end off.
When using outline stitch as a stem stitch, come up on the right of the line and go in on the left of the line, creating a diagonal stitch which goes over the line. Refer to the instructions and video clips for stem stitch at this link.
And now for the video clip that covers all of the above.
(Don’t forget to click the icon in the bottom right-hand corner to get it to full screen).