
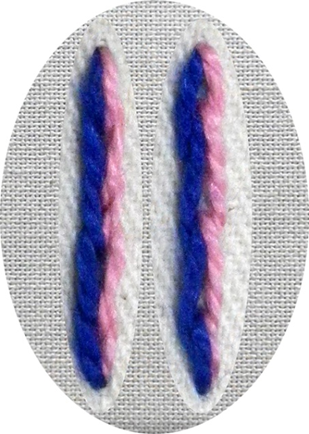
In the video clip on the tuition page, the small sample was worked with two colours of perle #5 thread on vertical parallel lines of 5 cm, placed 1 cm apart. If you wish to experiment with the stitch before you work it onto your project, draw similar lines on your cloth with a heat erasable pen.
These two stitches produce a finished result that is almost identical. In general, it is easier to work split backstitch.
The stitch instructions and diagrams appear below, with the video clip at the bottom of the page. If you would like a printable version, click here.
Working the stitches:
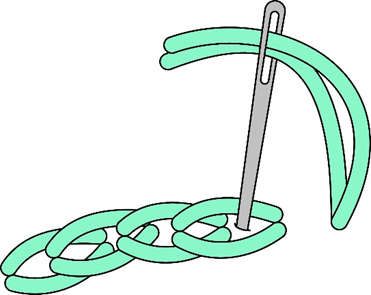
Split Stitch
- Work with 2 strands of thread.
- Come up at the beginning of the line.
- Go in again a little way along and before pulling through, come up again in the middle of the stitch, taking your needle up between the 2 strands of thread.
- Pull through to tighten.
- Finish with a straight stitch that is not split.
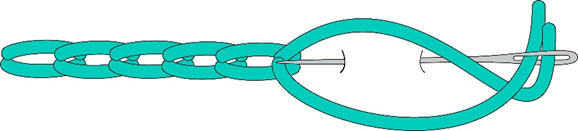
Split Backstitch
This is easier to work and gives a more pleasing result than traditional split stitch.
- Work a backstitch starting a stitch length away from the beginning of the line.
- Come up further along the line – a stitch length – and instead of going back into the hole at the end of the first stitch as you would for normal backstitch, take the needle down between the two threads of the previous backstitch, making sure that the threads of that stitch lie side by side with no twists.
- Keep going in this way. Finish with a backstitch that is not split.
And now for the video clip that covers all of the above.
(Don’t forget to click the icon in the bottom right-hand corner to get it to full screen).