Downloadable and printable PDF instructions.
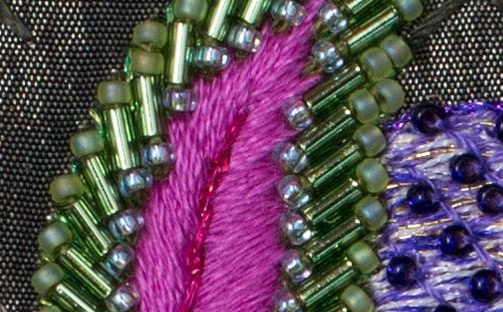
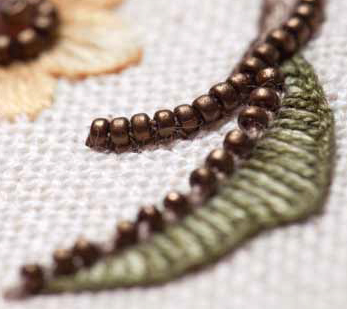
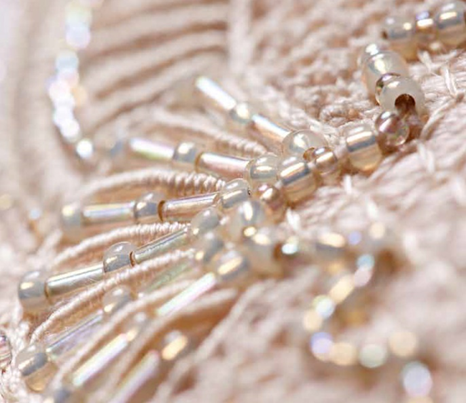
Bead Couching is useful for depicting beaded outlines, the veins of leaves, cirlicues, tendrils and when worked in lines close to one another, can fill areas of a motif. It gives a heavier line than beaded backstitch.
When recording the video clip on the tuition page, I used a doubled over strand of perle #12 thread on a size 7 embroidery needle. That was for clarity and under normal circumstances, when attaching beads to a project, I would use a doubled over single strand of cotton on either a size 10 or 12 bead embroidery needle or, better still, a size 10 or 11 ‘sharps’ quilting needle. In certain circumstances I might use a fine beading thread on a similar needle.
Both of these needles have a small eye that will fit through even the tiniest, size 15° bead and my preference for the quilting needle is because it doesn’t bend as quickly as a beading or bead embroidery needle.
In the video clip, I used a bright blue thread for clarity but once again, under normal circumstances, I would choose the colour of my thread based on the bead I am attaching, choosing one that is close to, or darker than, the colour of the beads.
Working the stitch:
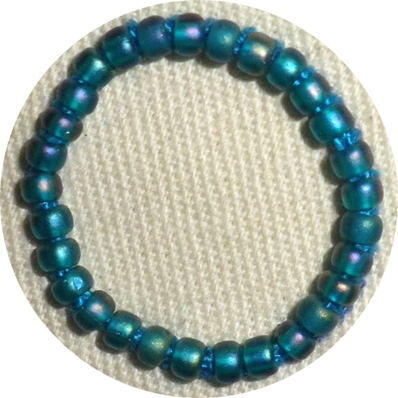
The sample in the video was worked on a 30 mm diameter circle using a doubled over strand of perle #12 thread and size 8° beads.

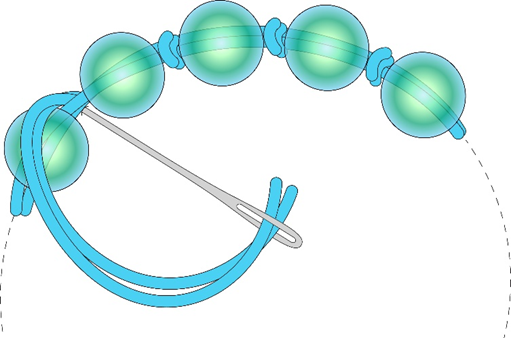
- Come up on the line and pick up 5 beads.
- Push the beads back to the base of the thread and referring to the pink arrow in the image above, leave a space about the width of a bead before going in on the line of the circle.
- Pushing the beads back to the beginning of the thread coming out of the fabric. Come up between beads 1 and 2, on the line of the circle.
- Work a couching stitch over the threads that run between the beads, going back into the fabric on the line of the circle and coming up between beads 2 and 3.
- Work a couching stitch over the thread running between those beads.
- Continue working couching stitches over the thread between beads 3 and 4, as well as between beads 4 and 5.
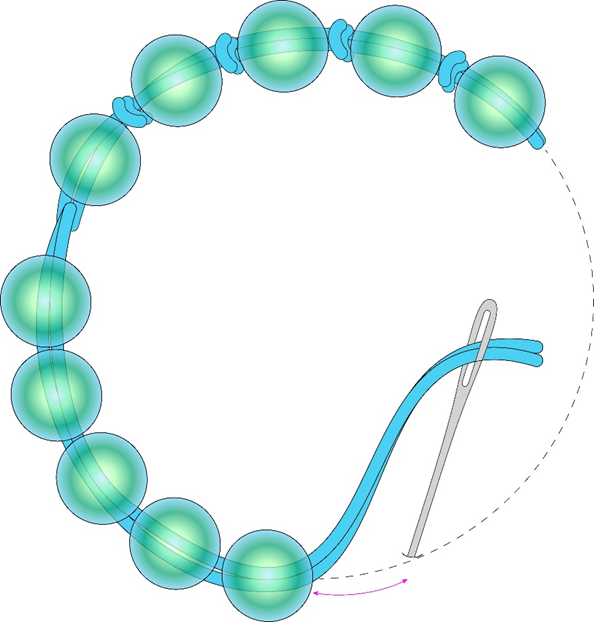
- Come up on the circle after the 5th bead, making sure that the needle is placed between the two strands of thread on which the first group of 5 beads was strung.
- This is important because it will ensure that you are directly opposite the hole of the 5th bead so, in the middle of the bead, and will mean that the line continues evenly. If you are not careful to do this, your line might zig zag because each group of beads is not properly lined up.
- Pick up a group of 5 beads and, referring to the pink arrow in the diagram above, leave a space that is approximately the width of a bead before going into the fabric on the line.
- As you did when you placed the first group, place couching stitches over the thread between each bead in the group and continue adding groups of beads in the same way.
- When you get towards the end of the circle – or line – estimate how much space you need to fill to get to the end.
- It is important to avoid finishing off with a single bead, stitched on individually, because it will sit at it’s own angle which will probably not be in line with the beads that precede it.
- If, for example, you find that you will need to fill the space with 7 beads, break the last two groups into 3 beads and 4 beads. The general principle is not more than 5 beads and at least 2 beads.
- When you have couched all of the beads in the line or circle, you will probably find that they are not sitting as neatly as you would like.
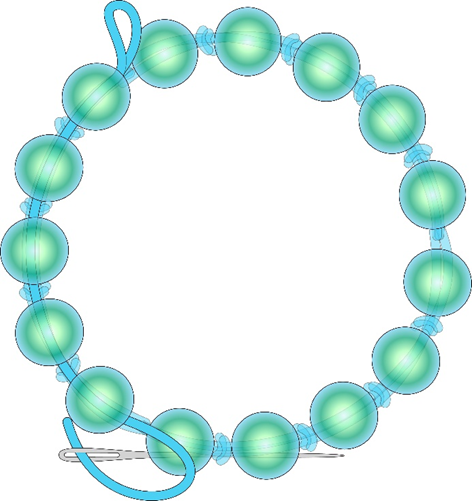
- So, bring the needle and thread up at the beginning of the line and thread through all of the beads in a continuous line.
- If you’re working a circle, it is a good idea to leave a loop at the beginning so that you can see where you started.
- As you get towards the end of the circle, pull through, making the loop disappear, go through the last bead or two and give that thread a good, hard tug. This will pull all of the beads slightly together and straighten them up.
- If you’re working on a line or a curve, you will do the same thing.
- Keeping the working thread firm, go to the back and end off.
In the video sample and because I was using a thicker thread than normal, I used a single strand of the perle thread to work the continuous final line. This can happen if you are couching small beads and you can do this final line with a single thread, maybe even putting it on a finer needle. You will soon know if you need to do this because you won’t be able to get through the couched beads. So, change to a single thread on a finer needle, but do try to do the continuous line. It does neaten things up nicely.