There are numerous knots in the video clip on this page. They are listed in the table below, in the order is which they appear, with the starting time for each variety in the right-hand column.
| French Knots – single wrap | 11 seconds |
| French Knots – two wraps | 33 seconds |
| Colonial Knots | 1 minute 6 seconds |
| French Knots – multiple wraps | 1 minute 51 seconds |
| Loose French Knot Filler | 4 minutes 50 seconds |
| Extended French Knots (Pistil Stitch) | 6 minutes 2 seconds |
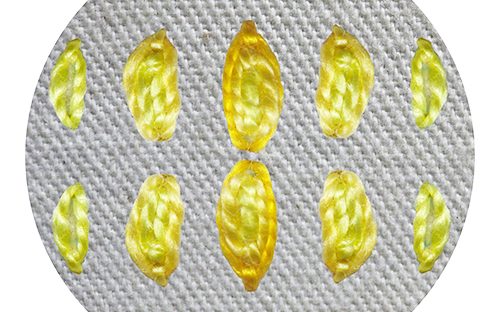
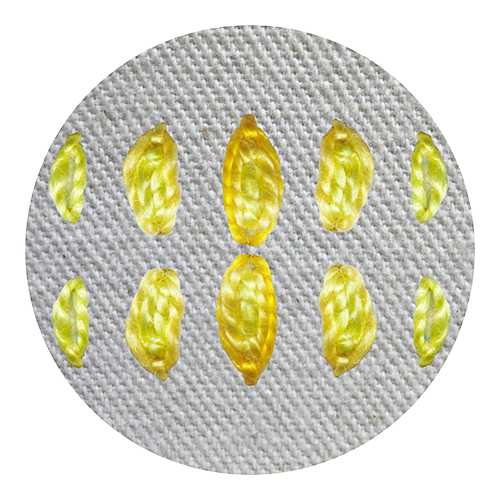
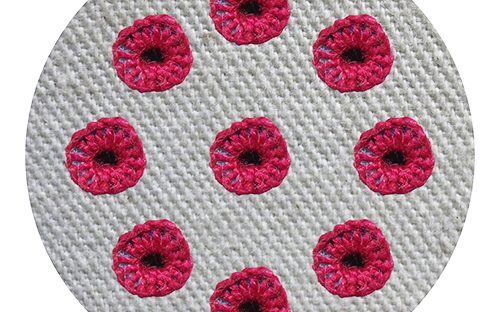
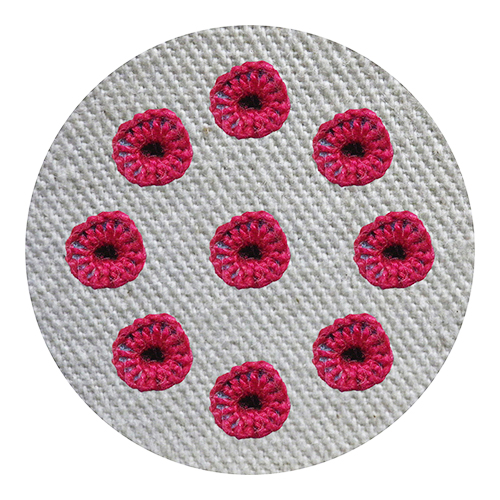
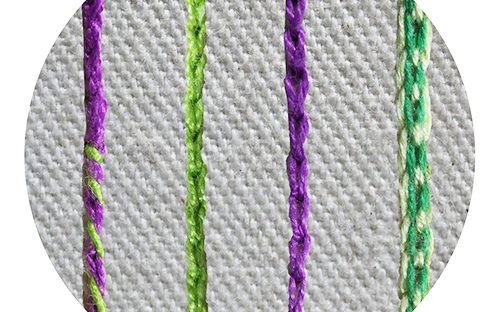
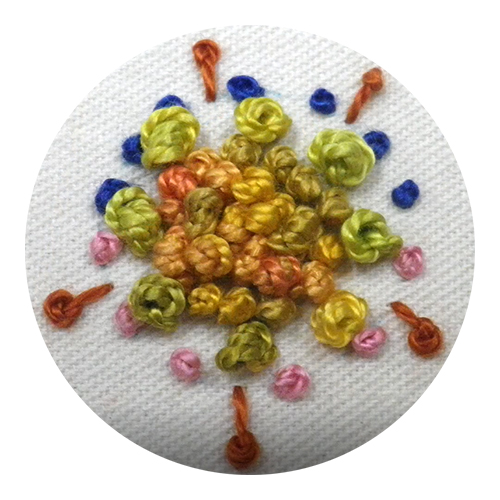
In the video clip on the tuition page, the small samples were worked with perle no. 5 thread on and within circles. If you wish to experiment with the stitch before you work it onto your project, work with similar thread.
The stitch instructions and diagrams appear below, with the video clip at the bottom of the page. If you would like a printable version, click here.
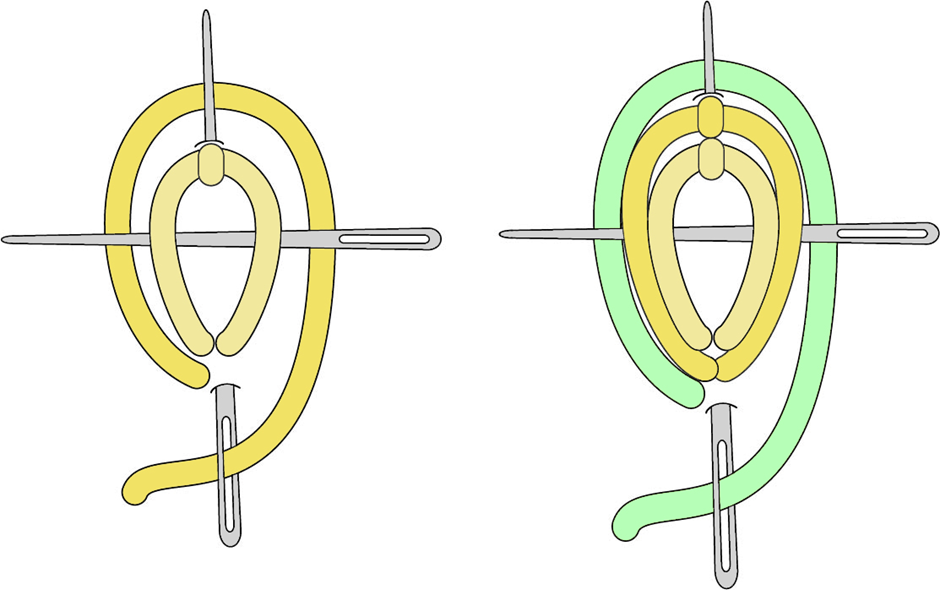
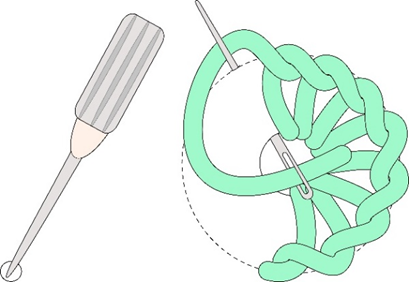
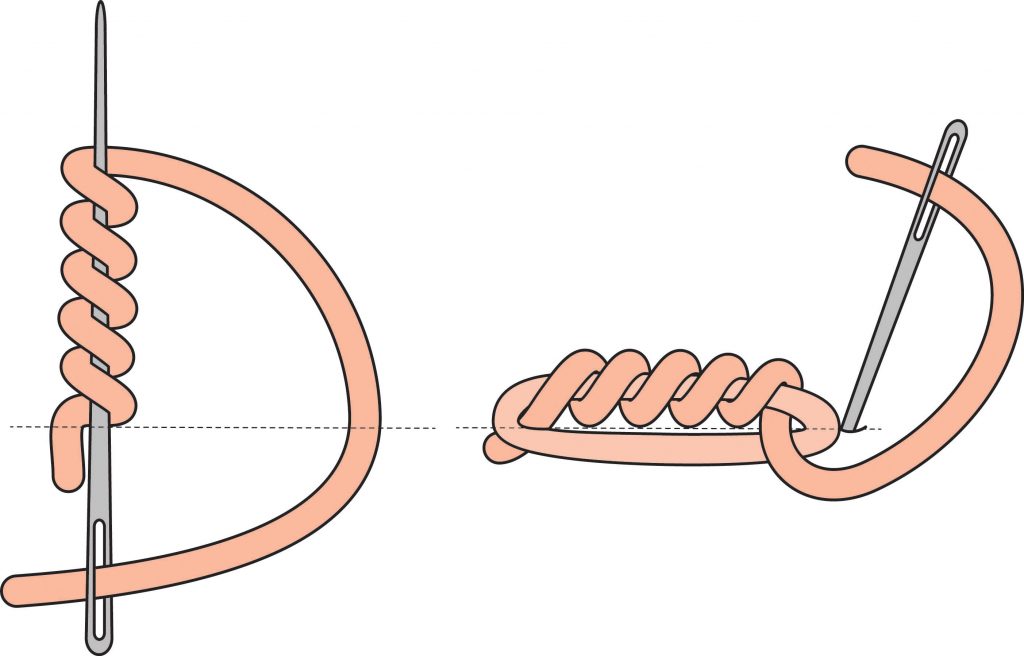
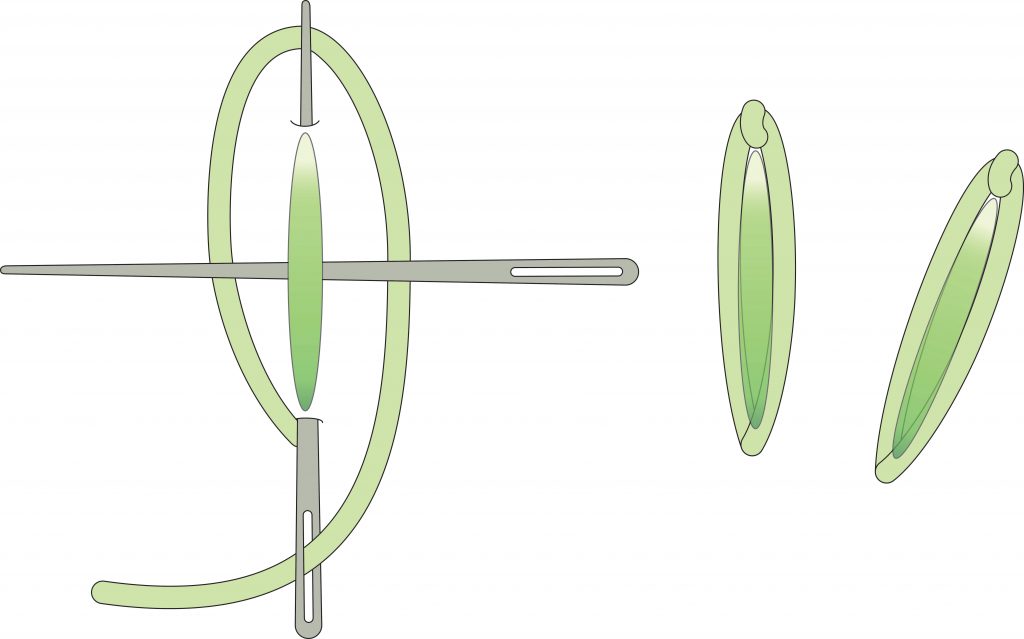
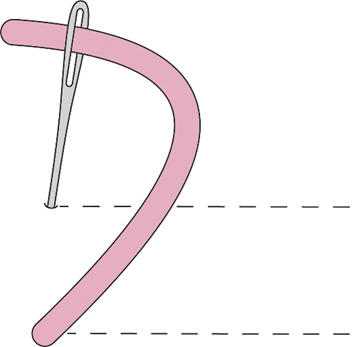
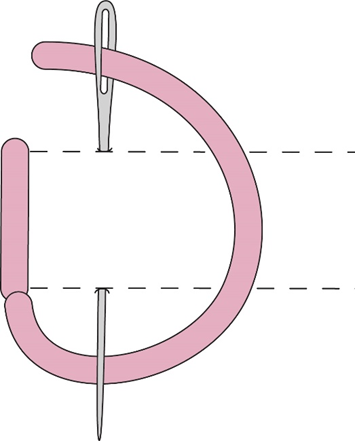
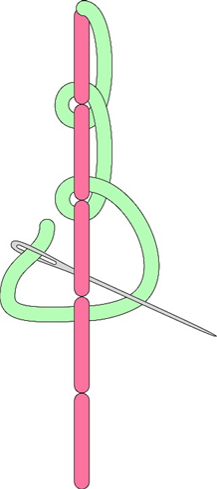
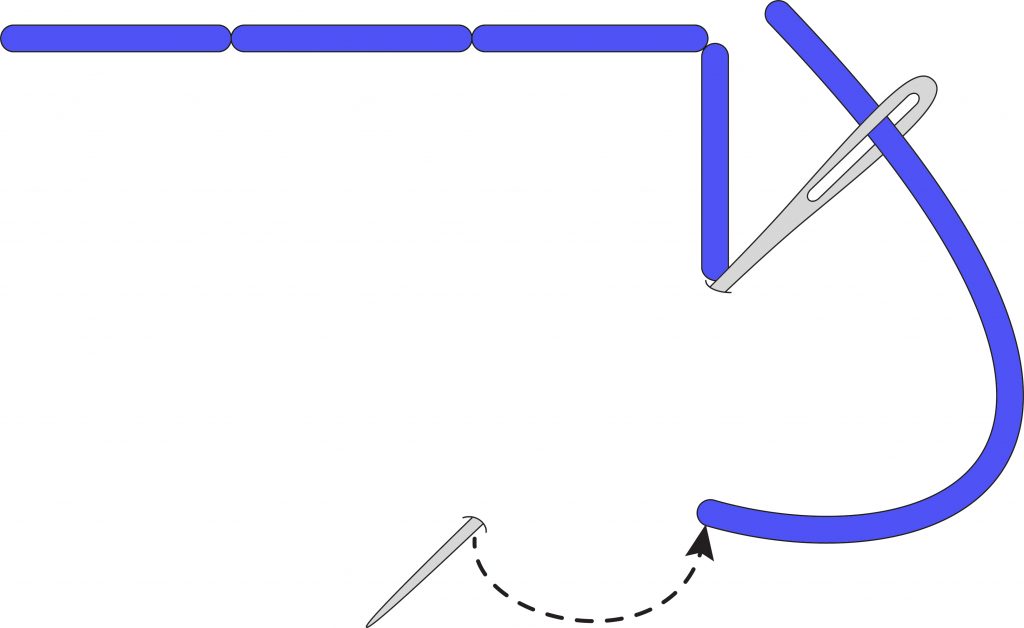
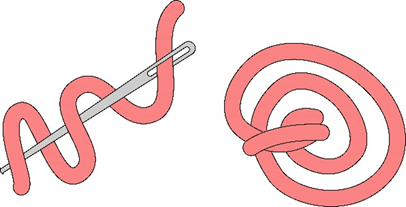
French Knot – single wrap
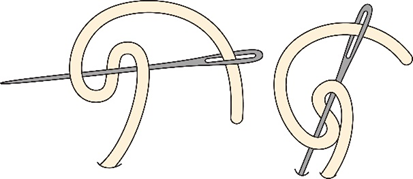
Bring the needle up through the fabric, twist the thread over the needle once and tighten. Go back into the fabric just next to where you came out. Pull the twist that is around the needle down to the bottom. Hold the thread and pull the needle through to form the knot.
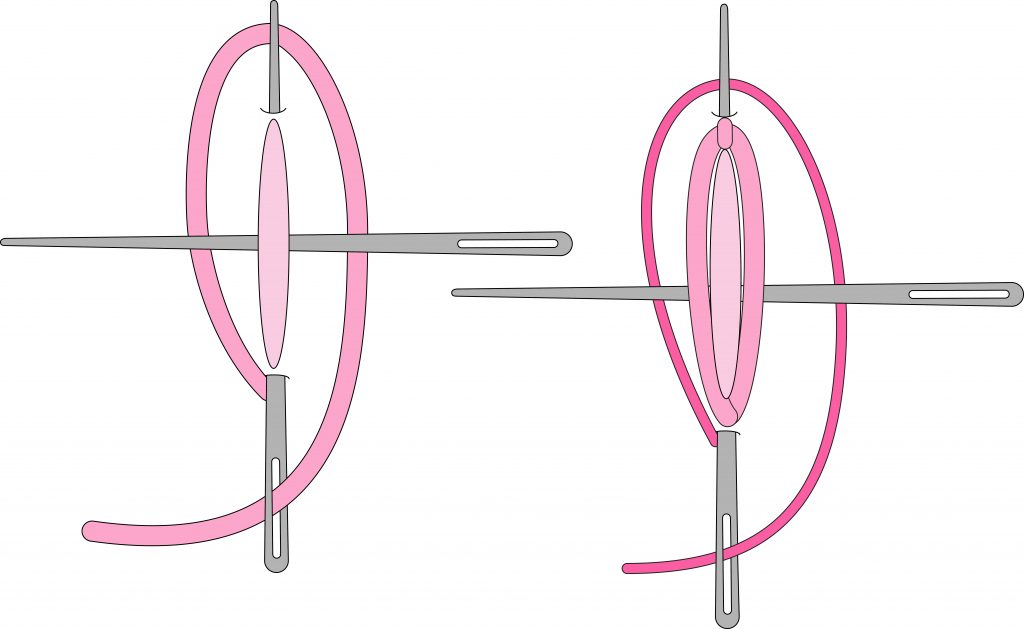
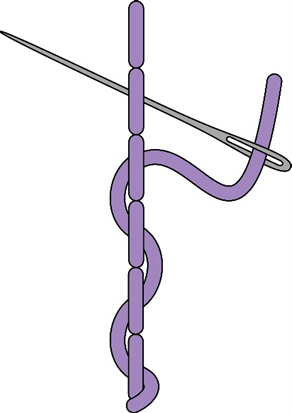
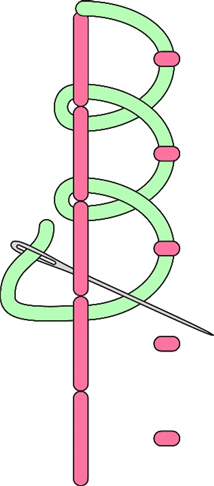
French Knot – two wraps
Bring the needle up through the fabric, twist the thread over the needle once or twice and tighten. Go back into the fabric just next to where you came out. Pull the twists that are around the needle down to the bottom. Hold the thread and pull the needle through to form the knot.
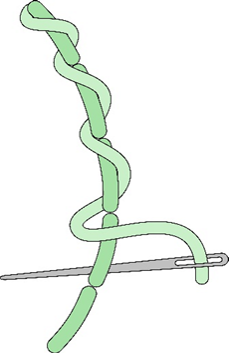
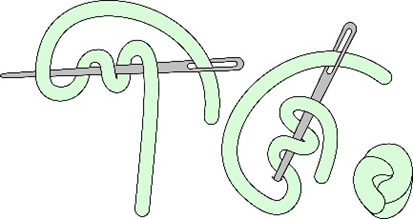
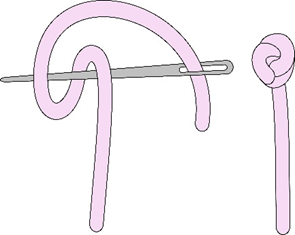
Colonial Knot
There is very little difference in the look of this knot when compared to the French knot. Bring the needle up through the fabric, pick up the thread in a backwards “C” shape. Take the working end of the thread over the needle to the right then under the needle to the left, effectively making a figure 8 with the thread. Go back into the fabric about ½ a millimeter away from where you came out. Pull the twists that are around the needle down to the bottom. Hold the thread and pull the needle through to form the knot.
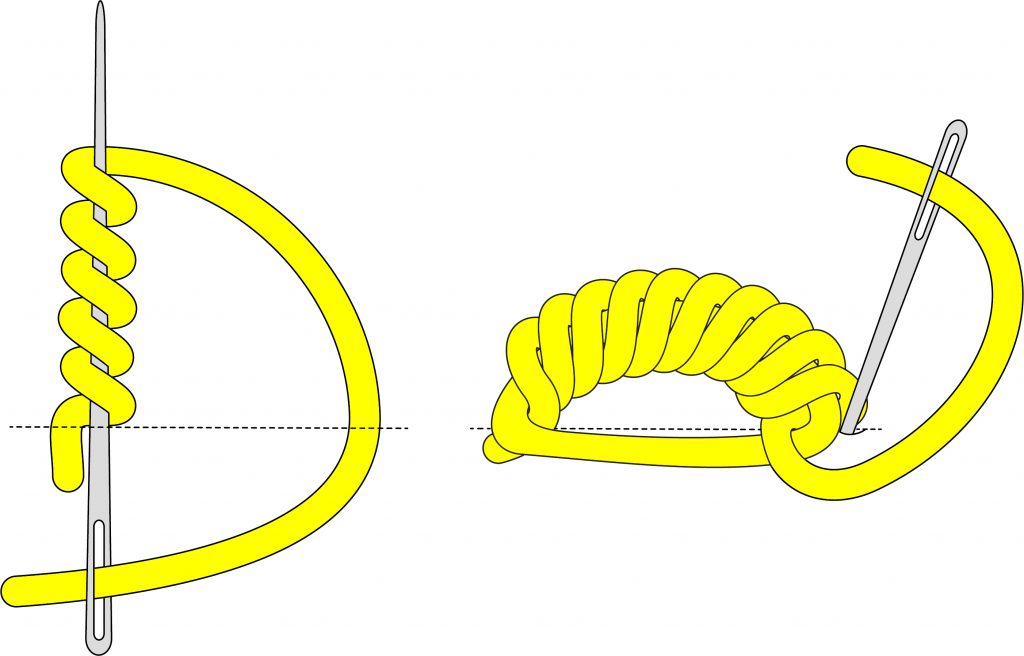
French Knot – Multiple wraps
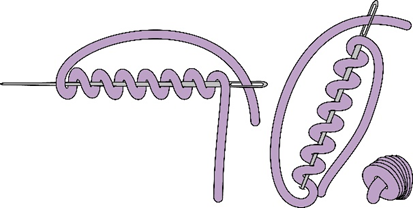
Bring the needle up through the fabric, twist the thread over the needle up to ten times. Go back into the fabric just next to where you came out, pulling the needle but not all of the thread through. Use the thread that remains on the top of the fabric to tug a few times until all of the loops have tightened into a little ball. Pull the thread through the rest of the way.
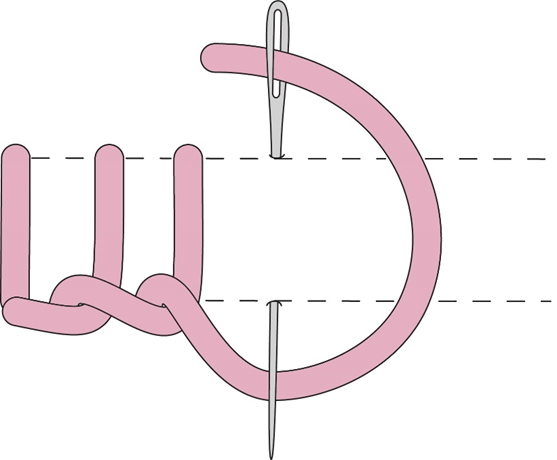
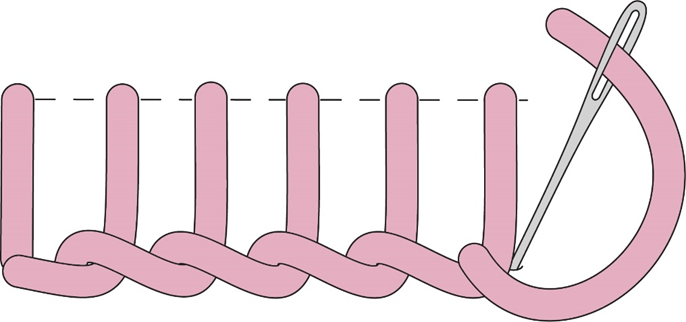
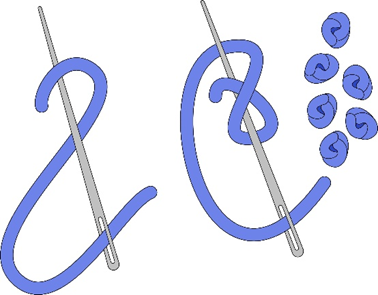
French Knot – loose
Bring the needle up through the fabric, loosely twist the thread over the needle two or three times. Tighten only slightly and go back into the fabric just next to where you came out. Pull the needle through controlling the twists as you do so, the aim being to achieve two or three loose loops of thread held down by the thread that goes into the fabric. Working a bunch of these together to fill an area creates the impression of foliage or flowers seen in the distance.
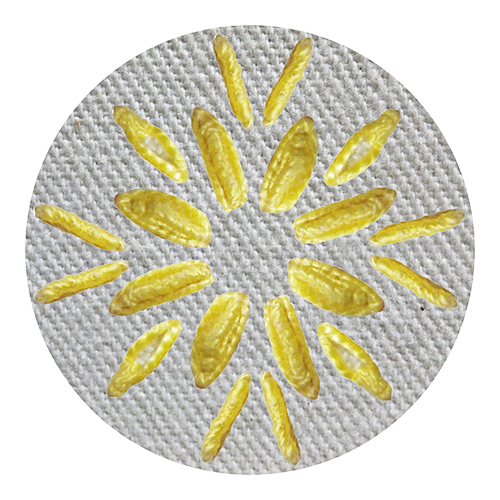
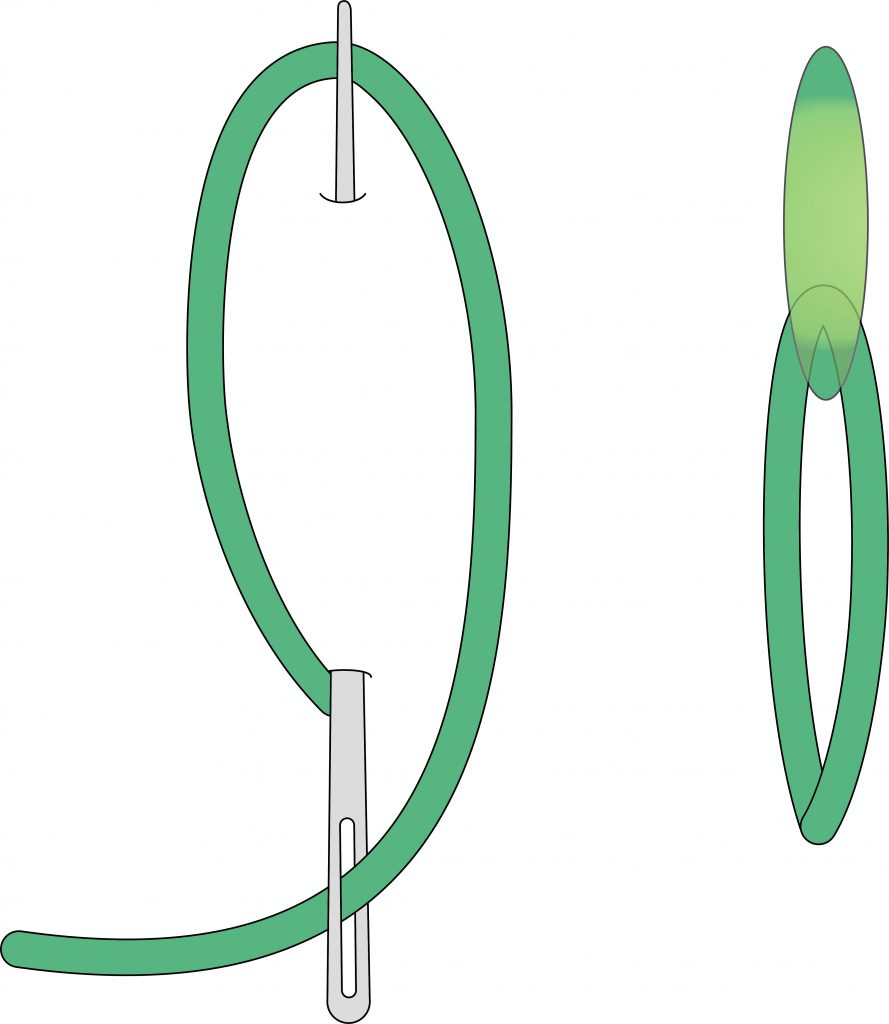
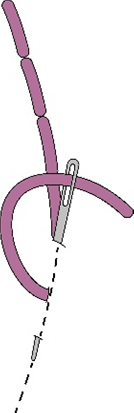
Extended French Knot (Pistil Stitch)
Bring the needle up through the fabric, twist the thread over the needle once or twice and tighten. Go back into the fabric away from where you came out. Pull the twists that are around the needle down to the bottom. Hold the thread and pull the needle through to form the knot.
And now for the video clip that covers all of the above.
(Don’t forget to click the icon in the bottom right-hand corner to get it to full screen).